La generación Baby Boomers está conformada por las personas nacidas entre 1960 y 1980.
¿Cómo consumen y se comportan?
Pasan entre 5 y 10 horas a la semana consumiendo contenidos en Internet. No son nativos digitales, pero usan bien las tecnologías. Consumen también medios tradicionales. Cuando adquieren un producto también piensan en su familia. Suelen ser escépticos y tienen vidas laborales muy activas.
Es importante destacar que los Baby Boomers representan un grupo objetivo muy importante para el marketing porque tienen una gran capacidad adquisitiva, por lo que representan un grupo muy significativo de la demanda del mercado.
Por otra parte, se encuentran dentro del rango de edad de los 57 a los 75 años por lo que algunos ya son viejos o están en proceso de envejecimiento. Esto hace que gasten mucho dinero en el mercado de los productos estéticos, buscando retardar el paso del tiempo.
Como consecuencia, compran productos que les ofrecen la eterna juventud. Sus preferencias de compra son los trasplantes capilares y tintes, cremas para reafirmar la piel y minimizar arrugas, suplementos alimenticios y comida orgánica. Asimismo, compran aparatos y máquinas para hacer ejercicios en casa.
Adicionalmente, son aficionados a ser miembros de clubs donde entablan relaciones sociales y practican deportes. Se divierten buscando actividades de ocio y de viaje. Es una generación que se caracteriza porque pueden ser atraídos por lo que compran los jóvenes.
Síguenos en nuestro canal dedicado a tecnología, marketplace de proyectos tecnológicos, cursos online y tutoriales de desarrollo de videojuegos.
¡Regístrate en nuestro portal y comienza a publicar tus propios proyectos!
Siguenos en nuestro canal de Youtube
Síguenos en nuestro canal de Youtube dedicado a Tecnología, MarketPlace de Proyectos Tecnológicos, Cursos Online y Tutoriales de Desarrollo de Videojuegos. Ofrecemos consultoría en Desarrollo de Software, Marketing Online, Servicios de TI, Hosting Web, dominios web entre otros.
Karting Micro-Game Template es un juego de carreras de karts en 3D que puedes modificar y personalizar. Completa las modificaciones creativas para construir sobre el proyecto y hacerlo más tuyo, mientras aprendes los conceptos básicos de Unity.
1. En la ventana de tu Proyecto, ubica la carpeta ModAssets (o ChallengeAssets) carpeta> 3D Props> carpeta Billboards Prefabs
2. Selecciona uno de los prefabricados de Billboard y arrástralo a la Vista de escena para crear una instancia en el mundo.
Nota: Los prefabricados Billboard Tall y Billboard Wide no se pueden escalar. El Billboard Basic puede.
La cartelera está actualmente en blanco. ¡Personalicemos la cartelera agregando una textura personalizada!
3. Busca una imagen que te gustaría colocar en tu juego y ubícala en tu computadora. Unity admite una variedad de diferentes formatos de imagen como texturas, como .png y .jpg
4. Una vez que hayas localizado la imagen, selecciona Activos> Importar nuevo activo.
5. Selecciona la imagen que deseas importar.
6. Haz clic en el frente verde de la cartelera para seleccionar el objeto de juego Billboard Content. Si no puedes ver el frente verde, orbita tu vista alrededor del Billboard manteniendo presionada la tecla Alt u Opción mientras haces clic y arrastra en la Vista de escena.
7. Selecciona la imagen que acabas de importar en la vista de proyecto y arrástrala al objeto de juego Billboard Content (el frente verde de la cartelera).
8. Dependiendo del tamaño de la imagen, puede parecer demasiado grande para el marco de la cartelera después de agregarse. Si es necesario, elije la herramienta Rect de la barra de herramientas (o presione T en su teclado). Con el GameObject de Billboard Content seleccionado, escala la imagen para que se ajuste al marco arrastrando los tiradores en las cuatro esquinas, y colócala dentro del marco arrastrando desde su centro.
Síguenos en nuestro canal de YouTube dedicado a tecnología, marketplace de proyectos tecnológicos, cursos online y tutoriales de desarrollo de videojuegos.
¡Regístrate en nuestro portal y comienza a publicar tus propios proyectos!
Síguenos en nuestro canal de YouTube dedicado a tecnología, marketplace de proyectos tecnológicos, cursos online y tutoriales de desarrollo de videojuegos. Ofrecemos consultoría en desarrollo de software, marketing online, servicios de TI, hosting web, dominios, web entre otros.
Karting Micro-Game Template es un juego de carreras de karts en 3D que puedes modificar y personalizar. Completa las modificaciones creativas para construir sobre el proyecto y hacerlo más tuyo, mientras aprendes los conceptos básicos de Unity.
¡Vea su pantalla de título en acción! Tu pantalla de título solo aparece cuando pausas el juego durante el juego. La tecla Esc es la tecla de pausa, por lo que para ver su nueva pantalla de título en acción simplemente ingresa al modo Jugar y luego pausa el juego presionando la tecla Esc. Recuerda, aunque tu juego esté en pausa, todavía estás en modo Play, así que asegúrate de salir manualmente del modo Play antes de realizar más modificaciones.
En este mod, aprenderá cómo cambiar el modo de juego a un modo de límite de tiempo, donde el objetivo es ganarle al reloj. ¡Debes completar un cierto número de vueltas antes de que se acabe el tiempo!
Síguenos en nuestro canal de YouTube dedicado a tecnología, marketplace de proyectos tecnológicos, cursos online y tutoriales de desarrollo de videojuegos.
Síguenos en nuestro canal de YouTube dedicado a tecnología, marketplace de proyectos tecnológicos, cursos online y tutoriales de desarrollo de videojuegos. Ofrecemos consultoría en desarrollo de software, marketing online, servicios de TI, hosting web, dominios, web y más.
Karting Micro-Game Template es un juego de carreras de karts en 3D que puedes modificar y personalizar. Completa las modificaciones creativas para construir sobre el proyecto y hacerlo más tuyo, mientras aprendes los conceptos básicos de Unity.
En este mod, aprenderá cómo cambiar el modo de juego a un modo de límite de tiempo, donde el objetivo es ganarle al reloj. ¡Debes completar un cierto número de vueltas antes de que se acabe el tiempo!
Fuera de la caja, Karting Microgame es un juego de contrarreloj. Contrarreloj es el modo de juego. En este mod, aprenderás cómo cambiar el modo de juego al modo de choque, donde el objetivo es chocar y derribar todos los bolos en la pista.
¡Hemos creado un cerebro de IA de carreras listo para el juego, completamente entrenado para un chasis personalizado, listo para usar en su Karting Microgame! Siga este mod para aprender cómo puede entrenar sus karts inteligentes desbloqueados.
Síguenos en nuestro canal dedicado a Tecnología, MarketPlace de Proyectos Tecnológicos, Cursos Online y Tutoriales de Desarrollo de Videojuegos.
Visita nuestro sitio web conoce nuestros proyectos, registrate y comienza a publicar tus propios proyectos!
Suscríbete a nuestro canal de youtube, dale like al vídeo y comenta que quieres participar
Siguenos en nuestro canal de Youtube
Síguenos en nuestro canal de Youtube dedicado a Tecnología, MarketPlace de Proyectos Tecnológicos, Cursos Online y Tutoriales de Desarrollo de Videojuegos. Ofrecemos consultoría en Desarrollo de Software, Marketing Online, Servicios de TI, Hosting Web, dominios web entre otros.
El ganador es (Luis Antonio C.G.) pronto te enviaremos un correo electrónico indicándote los detalles para la entrega del premio.
Participa y gana gratis un Asset Pagado de la Tienda de Unity Asset Store!!!.
El próximo domingo 18 de agosto estaremos anunciando el ganador!.
La definición de ganador es el que gana, obtiene, triunfa, vence, logra, aventaja, acede y rebasa a alguien o algo por lo general a un pleito, concurso, juego, deporte, oposición, en un sueldo, remuneración y también de su voluntad. Se puede usar también como sustantivo.
El origen de la palabra ganador.
Esta palabra en su etimología proviene del verbo activo transitivo «ganar» y del sufijo «dor» que indica el que suele realizar la acción o como agente y causante.
Las personas con carácter ganador poseen una serie de rasgos que les dan la posibilidad de lograr sus objetivos o metas, porque siempre siguen adelante pese a las adversidades. Poseen un carácter fuerte y una mentalidad resistente, además de poseer un gran control sobre su vida.
Síguenos en nuestro canal dedicado a Tecnología, MarketPlace de Proyectos Tecnológicos, Cursos Online y Tutoriales de Desarrollo de Videojuegos.
Visita nuestro sitio web conoce nuestros proyectos, registrate y comienza a publicar tus propios proyectos!
Suscríbete a nuestro canal de youtube, dale like al vídeo y comenta que quieres participar
Siguenos en nuestro canal de Youtube
Síguenos en nuestro canal de Youtube dedicado a Tecnología, MarketPlace de Proyectos Tecnológicos, Cursos Online y Tutoriales de Desarrollo de Videojuegos. Ofrecemos consultoría en Desarrollo de Software, Marketing Online, Servicios de TI, Hosting Web, dominios web entre otros.
¡Hola! Bienvenidos a este video donde les mostraremos cómo fotoescanear en pocos minutos y crear su primera reconstrucción en 3D con unos pocos clics e importar el modelo en tu motor de videojuegos con 3DF Zephyr. En este caso utilizaremos como motor el Unity 3D.
3DF Zephyr le permite reconstruir modelos 3D a partir de fotos automáticamente.
El proceso es completamente automático y no se necesitan objetivos codificados, edición manual o equipo especial. 3DF Zephyr se basa en nuestra tecnología de reconstrucción patentada y de vanguardia. 3DF Zephyr viene con una interfaz fácil de usar y la posibilidad de exportar en muchos formatos 3D comunes o incluso generar video sin pérdidas sin la necesidad de herramientas externas. Además, 3DF Zephyr tiene muchas funcionalidades avanzadas y puede, por ejemplo, editar sus modelos, crear ortofotos reales, modelos de elevación digital (DTM), administrar datos de escaneo láser y calcular áreas, volúmenes, ángulos, líneas de contorno y mucho más. más.
Aquí en 3Dflow, trabajamos arduamente para desarrollar tanto las tecnologías centrales como la interfaz de usuario. La solución obtenida es, con toda probabilidad, el algoritmo estéreo multivista más preciso, completamente automático y mejor diseñado disponible en el mercado.
¡No dudes en darnos tu opinión sobre el tutorial que te gustaría ver a continuación!
Alentamos preguntas y discusiones: siéntete libre de preguntar cualquier cosa en nuestros foros o en nuestro portal web.
Síguenos en nuestro canal de YouTube dedicado a tecnología, marketplace de proyectos tecnológicos, cursos online y tutoriales de desarrollo de videojuegos. Ofrecemos consultoría en desarrollo de software, marketing online, servicios de TI, hosting web, dominios, web y más.
¡Hola! Bienvenidos a este video donde les mostraremos cómo crear un primer producto mínimo viable de un juego RPG del tipo combate de magia en la modalidad Survival en tercera persona.
Para esto utilizaremos el activo gratuito de la Market Place de Unreal el Dynamic Combat System – Magic. Además de eso lo acompañaremos de un entorno fotoescaneado procedural también gratuito con altas prestaciones gráficas: el Enviroment Set.
Componentes de habilidad – Dynamic Combat System Magic
AbilityComponent es el intermediario entre el personaje (jugador o IA) y la habilidad (hechizo).
Observa el estado del propietario y la habilidad, si la habilidad se está lanzando, si se presiona la entrada, el montaje de animación de habilidad utilizado recientemente, la transformación de efecto de habilidad, etc.
Entonces, cuando el propietario presiona o libera la entrada de Ability, no llama directamente a eventos desde el plano de Ability, sino que llama a funciones de AbilityComponent, que a su vez informa sobre la habilidad en sí.
Variables útiles
CurrentAbility – Habilidad almacenada actualmente IsPressed: si la entrada de habilidad se presiona o se suelta IsCasting: si Ability está actualmente lanzando RecentPlayedMontage: último montaje de animación utilizado por Ability UpdateEquipmentAbility: si la habilidad debe actualizarse automáticamente según el elemento equipado en el componente de equipo
Funciones útiles
AbilityPressed: establece la variable IsPressed en true e informa a Ability al respecto AbilityReleased: establece la variable IsPressed en false e informa a Ability al respecto AbilityEffect: informa a Ability de que debería generar un efecto StartAbility: comprueba si Ability se puede lanzar, luego establece la variable IsCasting en true EndAbility: establece la variable IsCasting en false y finaliza la habilidad UpdateAbility: actualiza la capacidad almacenada actualmente PlayAbilityMontage: reproduce el montaje en la malla del personaje propietario y lo almacena en variables StopAbilityMontage – deja de jugar el montaje de habilidades La función EndAbility toma el parámetro de tipo E_AbilityEndResult para determinar el motivo del final de la habilidad. Terminado: la habilidad ha finalizado con éxito el lanzamiento Interrumpido: la capacidad se interrumpió, p. cuando el dueño se aturde Cancelado: la habilidad fue cancelada por el propietario OutOfMana: no había suficiente maná para mantener la habilidad de lanzar Destruido – la habilidad ha sido destruida AbilityComponent también es responsable del indicador de hechizo (indicador verde en el suelo que muestra la ubicación de la habilidad).
ShowSpellIndicator: muestra el indicador de hechizo, toma el material y el radio como parámetros HideSpellIndicator: oculta el indicador de hechizo
UpdateSpellIndicatorLocation: actualiza la ubicación actual del indicador de hechizo
Detalles Técnicos – Enviroment Set
Texture Sizes: (atlased and packed in: Base Color/Height, Normal, Metallic/Roughness/Ambient Occlusion)
Síguenos en nuestro canal de YouTube dedicado a tecnología, marketplace de proyectos tecnológicos, cursos online y tutoriales de desarrollo de videojuegos. Ofrecemos consultoría en desarrollo de software, marketing online, servicios de TI, hosting web, dominios, web y más.
¡Hola! Les compartimos en esta oportunidad un tutorial que nos ofrece un nuevo activo gratuito en la tienda de activos de Unity: el Kit de Juego 2D. El cual es libre de modificación y adecuación para desarrollos de juegos propios garantizado oficialmente por unidad. Esperamos les sea de mucho provecho.
Unity le da poder a los diseñadores de juego en hacer juegos. Lo que es realmente especial de Unity es que no se necesita años de experiencia programando o un titulo universitario en arte para hacer juegos divertidos. Hay un conjunto de conceptos de trabajo que se necesitan para aprender a utilizar Unity. Una vez se entiendan estos, uno va a poder encontrarse a sí mismo haciendo juegos en un instante. Con el tiempo que se va ahorrar poniendo sus juegos en funcionamiento, va a poder usar mucho más tiempo para refinar, balancear, y ajustar su juego a la perfección.
Esta sección va a explicar los conceptos básicos que se necesitara para crear una experiencia de juego única, increíble, y divertida. La mayoría de estos conceptos requieren que escriba Scripts. Para una visión generar de crear y trabajar con scripts, lea la página Scripting
Las escenas contienen los objetos de su juego. Pueden ser usadas para crear un menú principal, niveles individuales, y cualquier otra cosa. Piense en cada archivo de escena, como un nivel único. En cada escena, usted va a colocar su ambiente, obstáculos, y decoraciones, el diseño esencial y la construcción de su juego en pedazos.
Síguenos en nuestro canal de YouTube dedicado a tecnología, marketplace de proyectos tecnológicos, cursos online y tutoriales de desarrollo de videojuegos. Ofrecemos consultoría en desarrollo de software, marketing online, servicios de TI, hosting web, dominios, web y más.
El tiempo para crear la obra de arte, brindar atención al cliente y mantener las cosas actualizadas fue demasiado abrumador como un estudio de un solo hombre además de su trabajo de tiempo completo. En 2022, con algunos amigos, nació la idea de un estudio completamente nuevo. Sierra Division fue cofundada por Game and Film Industry Veterans y es el futuro de Top Tier Artwork disponible para el público. La compañía se dedica a crear obras de arte de la más alta calidad y brindar un servicio al cliente acogedor y rápido. Si está buscando más ilustraciones de PurePolygons, puede encontrar a Jacob y sus equipos trabajando en Sierra Division. Gracias a todos por el apoyo a lo largo de los años y la abrumadora positividad para la obra de arte. ¡Esto no es un adiós!
https://linktr.ee/sierradivision
R: Todos los paquetes de PurePolygons actuales permanecerán activos y actualizados a las últimas versiones de Unreal Engine, pero si está buscando nuevas ilustraciones y activos en Marketplace, Jacob (PurePolygons) ahora dedica su tiempo por completo a Sierra Division y al increíble equipo de personas que crean contenido allí. Gracias de nuevo
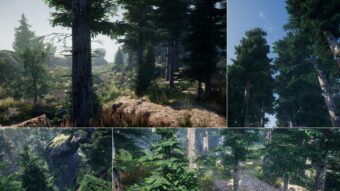
Todos los ríos son spline generados con un material que aumenta la velocidad del río en función de los ángulos de pendiente de la geo y agrega espuma al agua en la parte superior y la base de cualquier caída de agua. Así que no hay trabajo extra de su parte. ¡Simplemente colóquelo y listo!
Síguenos en nuestro canal de YouTube dedicado a tecnología, marketplace de proyectos tecnológicos, cursos online y tutoriales de desarrollo de videojuegos. Ofrecemos consultoría en desarrollo de software, marketing online, servicios de TI, hosting web, dominios, web y más.
Solo se necesita un sueño para crear un nuevo mundo. Unity te ofrece las herramientas necesarias para convertir ese sueño en realidad. Aquí encontrarás muchos consejos para comenzar a crear tu primer videojuego. No importa qué tantas habilidades o experiencia previa tengas: ¡lo importante es que tengas la motivación para crear algo extraordinario!
Unity es la plataforma de creación de juegos más utilizada del mundo: el 50 % de los juegos móviles se crean con esta plataforma, el 60 % del contenido de realidad aumentada y realidad virtual está impulsado por Unity. Además, el «desarrollador Unity» ocupa el puesto número 7 en la lista de los empleos de más rápido crecimiento, según un informe reciente de LinkedIn sobre nuevos empleos en los Estados Unidos.
Comienza a crear con un microjuego listo para utilizarse en Unity. Cada microjuego incluye su propia colección de mods, los cuales son personalizaciones sencillas y divertidas que también funcionan como introducción al diseño de juegos, la lógica, los elementos visuales y más.
Los nuevos creadores pueden descargar Unity de forma gratuita y comenzar a trabajar con los microjuegos y mods listos para utilizarse en Unity. Aprende con cientos de tutoriales, cursos, términos y kits de juego gratuitos y económicos, creados por Unity y por nuestra fabulosa comunidad.
Códigos para anexar a tu Character First Person utilizados en el video
using UnityEngine;
using System.Collections;
public class FirstPersonCharacter : MonoBehaviour
{
 [SerializeField] private float runSpeed = 8f;                                       // The speed at which we want the character to move
 [SerializeField] private float strafeSpeed = 4f;                                    // The speed at which we want the character to be able to strafe
 [SerializeField] private float jumpPower = 5f;                                      // The power behind the characters jump. increase for higher jumps
 [SerializeField] private AdvancedSettings advanced = new AdvancedSettings();        // The container for the advanced settings ( done this way so that the advanced setting are exposed under a foldout
 [SerializeField] private bool lockCursor = true;
 [System.Serializable]
 public class AdvancedSettings                                                       // The advanced settings
 {
 public float gravityMultiplier = 1f;                                            // Changes the way gravity effect the player ( realistic gravity can look bad for jumping in game )
 public PhysicMaterial zeroFrictionMaterial;                                     // Material used for zero friction simulation
 public PhysicMaterial highFrictionMaterial;                                     // Material used for high friction ( can stop character sliding down slopes )
 public float groundStickyEffect = 5f; // power of 'stick to ground' effect - prevents bumping down slopes.
 }
 private CapsuleCollider capsule;                                                    // The capsule collider for the first person character
 private const float jumpRayLength = 0.7f;                                           // The length of the ray used for testing against the ground when jumping
 public bool grounded { get; private set; }
 private Vector2 input;
 private IComparer rayHitComparer;
 void Awake ()
 {
 // Set up a reference to the capsule collider.
 capsule = GetComponent() as CapsuleCollider;
 grounded = true;
 rayHitComparer = new RayHitComparer();
 if (lockCursor)
 {
 Cursor.lockState = CursorLockMode.Locked;
 Cursor.visible = false;
 }
 else
 {
 Cursor.lockState = CursorLockMode.None;
 Cursor.visible = true;
 }
 }
 void OnDisable()
 {
 Cursor.lockState = CursorLockMode.None;
 Cursor.visible = true;
 }
 void Update()
 {
 if (Input.GetMouseButtonUp(0))
 {
 Cursor.lockState = CursorLockMode.Locked;
 Cursor.visible = false;
 }
        if (Input.GetKeyDown(KeyCode.Escape))
        {
            Cursor.lockState = CursorLockMode.None;
            Cursor.visible = true;
        }
 }
 public void FixedUpdate ()
 {
 float speed = runSpeed;
 float h = Input.GetAxis("Horizontal");
 float v = Input.GetAxis("Vertical");
 bool jump = Input.GetButton("Jump");
 input = new Vector2( h, v );
 // normalize input if it exceeds 1 in combined length:
 if (input.sqrMagnitude > 1) input.Normalize();
 // Get a vector which is desired move as a world-relative direction, including speeds
 Vector3 desiredMove = transform.forward * input.y * speed + transform.right * input.x * strafeSpeed;
 // preserving current y velocity (for falling, gravity)
 float yv = GetComponent().velocity.y;
 // add jump power
 if (grounded && jump) {
 yv += jumpPower;
 grounded = false;
 }
 // Set the rigidbody's velocity according to the ground angle and desired move
 GetComponent().velocity = desiredMove + Vector3.up * yv;
 // Use low/high friction depending on whether we're moving or not
 if (desiredMove.magnitude > 0 || !grounded)
 {
 GetComponent().material = advanced.zeroFrictionMaterial;
 } else {
 GetComponent().material = advanced.highFrictionMaterial;
 }
 // Ground Check:
 // Create a ray that points down from the centre of the character.
 Ray ray = new Ray(transform.position, -transform.up);
 // Raycast slightly further than the capsule (as determined by jumpRayLength)
 RaycastHit[] hits = Physics.RaycastAll(ray, capsule.height * jumpRayLength );
 System.Array.Sort (hits, rayHitComparer);
 if (grounded || GetComponent().velocity.y < jumpPower * .5f)
 {
 // Default value if nothing is detected:
 grounded = false;
 // Check every collider hit by the ray
 for (int i = 0; i < hits.Length; i++)
 {
 // Check it's not a trigger
 if (!hits[i].collider.isTrigger)
 {
 // The character is grounded, and we store the ground angle (calculated from the normal)
 grounded = true;
 // stick to surface - helps character stick to ground - specially when running down slopes
 //if (rigidbody.velocity.y <= 0) {
 GetComponent().position = Vector3.MoveTowards (GetComponent().position, hits[i].point + Vector3.up * capsule.height*.5f, Time.deltaTime * advanced.groundStickyEffect);
 //}
 GetComponent().velocity = new Vector3(GetComponent().velocity.x, 0, GetComponent().velocity.z);
 break;
 }
 }
 }
 Debug.DrawRay(ray.origin, ray.direction * capsule.height * jumpRayLength, grounded ? Color.green : Color.red );
 // add extra gravity
 GetComponent().AddForce(Physics.gravity * (advanced.gravityMultiplier - 1));
 }
 //used for comparing distances
 class RayHitComparer: IComparer
 {
 public int Compare(object x, object y)
 {
 return ((RaycastHit)x).distance.CompareTo(((RaycastHit)y).distance);
 }
 }
}
using UnityEngine;
using UnityStandardAssets.CrossPlatformInput;
public class MouseRotator : MonoBehaviour {
 // A mouselook behaviour with constraints which operate relative to
 // this gameobject's initial rotation.
 // Only rotates around local X and Y.
 // Works in local coordinates, so if this object is parented
 // to another moving gameobject, its local constraints will
 // operate correctly
 // (Think: looking out the side window of a car, or a gun turret
 // on a moving spaceship with a limited angular range)
 // to have no constraints on an axis, set the rotationRange to 360 or greater.
 public Vector2 rotationRange = new Vector3(70,70);
 public float rotationSpeed = 10;
 public float dampingTime = 0.2f;
 public bool autoZeroVerticalOnMobile = true;
 public bool autoZeroHorizontalOnMobile = false;
 public bool relative = true;
 Vector3 targetAngles;
 Vector3 followAngles;
 Vector3 followVelocity;
 Quaternion originalRotation;
 // Use this for initialization
 void Start () {
 originalRotation = transform.localRotation;
 }
 // Update is called once per frame
 void Update () {
 // we make initial calculations from the original local rotation
 transform.localRotation = originalRotation;
 // read input from mouse or mobile controls
 float inputH = 0;
 float inputV = 0;
 if (relative)
 {
 inputH = CrossPlatformInputManager.GetAxis("Horizontal");
 inputV = CrossPlatformInputManager.GetAxis("Vertical");
 // wrap values to avoid springing quickly the wrong way from positive to negative
 if (targetAngles.y > 180) { targetAngles.y -= 360; followAngles.y -= 360; }
 if (targetAngles.x > 180) { targetAngles.x -= 360; followAngles.x-= 360; }
 if (targetAngles.y < -180) { targetAngles.y += 360; followAngles.y += 360; }
 if (targetAngles.x < -180) { targetAngles.x += 360; followAngles.x += 360; }
 // with mouse input, we have direct control with no springback required.
 targetAngles.y += inputH * rotationSpeed;
 targetAngles.x += inputV * rotationSpeed;
 // clamp values to allowed range
 targetAngles.y = Mathf.Clamp ( targetAngles.y, -rotationRange.y * 0.5f, rotationRange.y * 0.5f );
 targetAngles.x = Mathf.Clamp ( targetAngles.x, -rotationRange.x * 0.5f, rotationRange.x * 0.5f );
 } else {
 inputH = Input.mousePosition.x;
 inputV = Input.mousePosition.y;
 // set values to allowed range
 targetAngles.y = Mathf.Lerp ( -rotationRange.y * 0.5f, rotationRange.y * 0.5f, inputH/Screen.width );
 targetAngles.x = Mathf.Lerp ( -rotationRange.x * 0.5f, rotationRange.x * 0.5f, inputV/Screen.height );
 }
 // smoothly interpolate current values to target angles
 followAngles = Vector3.SmoothDamp( followAngles, targetAngles, ref followVelocity, dampingTime );
 // update the actual gameobject's rotation
 transform.localRotation = originalRotation * Quaternion.Euler( -followAngles.x, followAngles.y, 0 );
 }
}
using UnityEngine;
using System.Collections;
using UnityEngine.UI;
using UnityEngine.SceneManagement;
public class FirstPersonHeadBob : MonoBehaviour {
 // Head bobbing is controlled by a sine wave and the character's speed, modulated by a handful of values.
 // This script also controls sound effects for footsteps, landing and jumping
 // (because the footsteps are tied to the head bob cycle)
 // When jumping or landing, the head also moves and tilts based on some simple springy calculations.
 [SerializeField] Transform head; // the object to which the head-bob movement should be applied
 // these modulate the head bob movement
 [SerializeField] float headBobFrequency = 1.5f; // the base speed of the head bobbing (in cycles per metre)
 [SerializeField] float headBobHeight = 0.3f; // the height range of the head bob
 [SerializeField] float headBobSwayAngle = 0.5f; // the angle which the head tilts to left & right during the bob cycle
 [SerializeField] float headBobSideMovement = 0.05f; // the distance the head moves to left & right during the bob cycle
 [SerializeField] float bobHeightSpeedMultiplier = 0.3f; // the amount the bob height increases as the character's speed increases (for a good 'run' effect compared with walking)
 [SerializeField] float bobStrideSpeedLengthen = 0.3f; // the amount the stride lengthens based on speed (so that running isn't like a silly speedwalk!)
 // these control the amount of movement applied to the head when the character jumps or lands
 [SerializeField] float jumpLandMove = 3;
 [SerializeField] float jumpLandTilt = 60;
 // audio clip references
 [SerializeField] AudioClip[] footstepSounds; // an array of footstep sounds that will be randomly selected from.
 [SerializeField] AudioClip jumpSound; // the sound played when character leaves the ground.
 [SerializeField] AudioClip landSound; // the sound played when character touches back on ground.
 // private vars:
 FirstPersonCharacter character; // a reference to the First Person Character component (on the parent gameobject)
 Vector3 originalLocalPos; // the original local position of this gameobject at Start
 //float nextStepTime = 0.5f; // the time at which the next footstep sound is due to occur
 float headBobCycle = 0; // the current position through the headbob cycle
 float headBobFade = 0; // the current amount to which the head bob position is being applied or not (it is faded out when the character is not moving)
 // Fields for simple spring calculation:
 float springPos = 0;
 float springVelocity = 0;
 float springElastic = 1.1f;
 float springDampen = 0.8f;
 float springVelocityThreshold = 0.05f;
 float springPositionThreshold = 0.05f;
 Vector3 prevPosition; // the position from last frame
 Vector3 prevVelocity = Vector3.zero; // the velocity from last frame
 bool prevGrounded = true; // whether the character was grounded last frame
 // Use this for initialization
 void Start () {
 originalLocalPos = head.localPosition;
 character = GetComponent();
 if (GetComponent() == null)
 {
 // we automatically add an audiosource, if one has not been manually added.
 // (if you want to control the rolloff or other audio settings, add an audiosource manually)
 gameObject.AddComponent();
 }
 prevPosition = GetComponent().position;
 ShootParticle = GetComponentInChildren();
        rb = GetComponent();
 anima = GetComponent();
        //Control = GetComponent();
        Control = GetComponent();
        health = GetComponent();
 //       floorMask = LayerMask.GetMask("floor");
        txtLives.text = "Lives: " + lives.ToString();
        txtZombies.text = "" + zombiesCount.ToString();
        PlayerController = GetComponent();
        Actions = GetComponent();
//        PlayerController.SetArsenal("Rifle");
 //       audio = GetComponent();
 //       camera= GetComponent();
        shootableMask = LayerMask.GetMask("Shooteable");
 }
 // Update is called once per frame
 void FixedUpdate () {
 // we use the actual distance moved as the velocity since last frame, rather than reading
 //the rigidbody's velocity, because this prevents the 'running against a wall' effect.
 Vector3 velocity = (GetComponent().position - prevPosition) / Time.deltaTime;
 Vector3 velocityChange = velocity - prevVelocity;
 prevPosition = GetComponent().position;
 prevVelocity = velocity;
                  // vertical head position "spring simulation" for jumping/landing impacts
 springVelocity -= velocityChange.y; // input to spring from change in character Y velocity
 springVelocity -= springPos*springElastic; // elastic spring force towards zero position
 springVelocity *= springDampen; // damping towards zero velocity
 springPos += springVelocity * Time.deltaTime; // output to head Y position
 springPos = Mathf.Clamp( springPos, -.3f, .3f ); // clamp spring distance
 // snap spring values to zero if almost stopped:
 if (Mathf.Abs(springVelocity) < springVelocityThreshold && Mathf.Abs (springPos) < springPositionThreshold)
 {
 springVelocity = 0;
 springPos = 0;
 }
 // head bob cycle is based on "flat" velocity (i.e. excluding Y)
 float flatVelocity = new Vector3(velocity.x,0,velocity.z).magnitude;
 // lengthen stride based on speed (so run bobbing isn't lots of little steps)
 float strideLengthen = 1 + (flatVelocity * bobStrideSpeedLengthen);
 // increment cycle
 headBobCycle += (flatVelocity / strideLengthen) * (Time.deltaTime / headBobFrequency);
 // actual bobbing and swaying values calculated using Sine wave
 float bobFactor = Mathf.Sin(headBobCycle*Mathf.PI*2);
 float bobSwayFactor = Mathf.Sin(headBobCycle*Mathf.PI*2 + Mathf.PI*.5f); // sway is offset along the sin curve by a quarter-turn in radians
 bobFactor = 1-(bobFactor*.5f+1); // bob value is brought into 0-1 range and inverted
 bobFactor *= bobFactor; // bob value is biased towards 0
 // fade head bob effect to zero if not moving
 if (new Vector3(velocity.x,0,velocity.z).magnitude < 0.1f)
 {
 headBobFade = Mathf.Lerp(headBobFade,0,Time.deltaTime);
 } else {
 headBobFade = Mathf.Lerp(headBobFade,1,Time.deltaTime);
 }
 // height of bob is exaggerated based on speed
 float speedHeightFactor = 1 + (flatVelocity * bobHeightSpeedMultiplier);
 // finally, set the position and rotation values
 float xPos = -headBobSideMovement * bobSwayFactor;
 float yPos = springPos * jumpLandMove + bobFactor*headBobHeight*headBobFade*speedHeightFactor;
 float xTilt = -springPos*jumpLandTilt;
 float zTilt = bobSwayFactor*headBobSwayAngle*headBobFade;
 head.localPosition = originalLocalPos + new Vector3(xPos, yPos, 0);
 head.localRotation = Quaternion.Euler(xTilt,0,zTilt);
 // Play audio clips based on leaving ground/landing and head bob cycle
 if (character.grounded )
 {
 if (!prevGrounded)
 {
 GetComponent().clip = landSound;
 GetComponent().Play();
 //nextStepTime = headBobCycle + .5f;
 } else {
 /* // Don't play footstep sounds for this demo
 if ( headBobCycle > nextStepTime)
 {
 // time for next footstep sound:
 nextStepTime = headBobCycle + .5f;
 // pick & play a random footstep sound from the array,
 // excluding sound at index 0
 int n = Random.Range(1,footstepSounds.Length);
 audio.clip = footstepSounds[n];
 audio.Play();
 // move picked sound to index 0 so it's not picked next time
 footstepSounds[n] = footstepSounds[0];
 footstepSounds[0] = audio.clip;
 }
  */
 }
 prevGrounded = true;
 } else {
 if (prevGrounded)
 {
 GetComponent().clip = jumpSound;
 GetComponent().Play();
 }
 prevGrounded = false;
 }
 }
 public float speed = 2f;
    public int lives = 10;
    public int zombiesCount = 0;
    public Text txtLives;
    public Text txtZombies;
    private Animator anima;
    private bool walking;
    Vector3 playerToMouse;
//    int floorMask;
//    float camRayLength = 100f;
    Rigidbody rb;
    Vector3 move;
    float timeLimit = 2f;
  //  AudioSource audio;
//    public Camera camera;
    public FixedJoystick LeftJoystick;
    public FixedButton Button;
    public FixedTouchField TouchField;
    //protected ThirdPersonUserControl Control;
    protected FirstPersonHeadBob Control;
 protected Actions Actions;
 //protected Rigidbody Rigidbody;
 protected PlayerController PlayerController;
    protected float CameraAngle;
    protected float CameraAngleY;
    protected float CameraAngleSpeed = 0.3f;
 protected float CameraPosY;
 protected float CameraPosSpeed = 0.3f;
    private CharacterHealth health;
 protected ParticleSystem ShootParticle;
 protected float CoolDown;
    Ray shootRay;
    RaycastHit shootHit;
    int shootableMask;
//    LineRenderer gunLine;
//    Light gunLight;
//    float effectGun = 0.2f;
    ShootController shootController;
    public float TimeBullet = 0.15f;
    float timer;
    public float range = 100f;
    // Use this for initialization
 // Update is called once per frame
 void Update () {
 //var input = new Vector3(LeftJoystick.Horizontal,0,LeftJoystick.Vertical);
        /* var vel = Quaternion.AngleAxis(CameraAngleY + 180, Vector3.up) * input *5f;
        rb.velocity = new Vector3(vel.x, rb.velocity.y, vel.z);
        transform.rotation = Quaternion.AngleAxis(CameraAngleY + 180 + Vector3.SignedAngle(Vector3.forward, input.normalized + Vector3.forward * 0.001f, Vector3.up),Vector3.up);
        CameraAngleY += TouchField.TouchDist.x * CameraAngleSpeed;
        //CameraAngle += Mathf.Clamp(CameraAngleY - TouchField.TouchDist.x * CameraAngleSpeed, 0, 5f);
        CameraPosY = Mathf.Clamp(CameraPosY - TouchField.TouchDist.y * CameraPosSpeed,0, 5f);
        //CameraPosY += TouchField.TouchDist.y * CameraAngleSpeed;
        Camera.main.transform.position = transform.position + Quaternion.AngleAxis(CameraAngleY, Vector3.up) * new Vector3(0, CameraPosY, 1);
        Camera.main.transform.rotation = Quaternion.LookRotation(transform.position + Vector3.up * 2f - Camera.main.transform.position, Vector3.up);
*/
/*
 var ray = Camera.main.ScreenPointToRay(new Vector3(Screen.width / 2f, Screen.height / 2f,0));
 Debug.DrawRay(ray.origin, ray.direction, Color.red);
 CoolDown += Time.deltaTime;
        if(Button.Pressed && CoolDown >= TimeBullet){
            //audio.Play();
            Actions.Attack();
 if(CoolDown>=0f){
 CoolDown = 0f;
 //               ShootParticle.Play();
 RaycastHit hitinfo;
 if(Physics.Raycast(ray, out hitinfo, range, shootableMask)){
                    Enemy other =hitinfo.collider.GetComponent();
 if(other != null){
 other.GetComponent().AddForceAtPosition((hitinfo.point - ShootParticle.transform.position).normalized * 500f, hitinfo.point);
                        other.takeDamage();
 }
 }
 }
 } else {
//            ShootParticle.Stop();
 if(rb.velocity.magnitude > 3f){
 Actions.Run();
 } else if(rb.velocity.magnitude > 0.5f){
 Actions.Walk();
 } else {
 Actions.Stay();
 }
 }*/
        if (lives <= 0)
        {
            /*if (timeLimit > 1)
            {
                timeLimit -= Time.deltaTime;
            }
            else
            {*/
                SceneManager.LoadScene("Perdiste");
            //}
        }
        if (zombiesCount >= 100)
        {
            /*if (timeLimit > 1)
            {
                timeLimit -= Time.deltaTime;
            }
            else
            {*/
                SceneManager.LoadScene("Ganaste");
            //}
        }
 }
  /*  public void DisabledEffects()
    {
        gunLine.enabled = false;
        gunLight.enabled = false;
    }*/
    public void Attack()
    {
        lives -= 1;
        txtLives.text = "Lives: " + lives.ToString();
        health.DealDamage(1);
        if (lives <= 0)
        {
            //anima.SetTrigger("Death");
            //GetComponent().isTrigger = true;
            //GetComponent().enabled = false;
        }
    }
    public void updateZombiesCount()
    {
        zombiesCount += 1;
        txtZombies.text = "" + zombiesCount.ToString();
    }
}
using System.Collections;
using System.Collections.Generic;
using UnityEngine;
using UnityEngine.UI;
public class CharacterHealth : MonoBehaviour {
 public float CurrentHealth {
 get;
 set;
 }
 public float MaxHealth {
 get;
 set;
 }
    private Animator anima;
 public Slider HealthBar;
 // Use this for initialization
 void Start () {
 MaxHealth = 50f;
        CurrentHealth = MaxHealth;
        anima = GetComponent();
 HealthBar.value = CalculateHealth();
    }
 // Update is called once per frame
 void Update () {
 if(Input.GetKeyDown(KeyCode.X)){
 DealDamage(1);
 }
 }
 public void DealDamage(float damageValue){
        CurrentHealth -= damageValue;
 HealthBar.value= CalculateHealth();
 if(CurrentHealth <= 0){
 Die();
 }
 }
 float CalculateHealth(){
 return CurrentHealth /MaxHealth;
 }
 void Die(){
 CurrentHealth = 0;
 anima.SetTrigger("Death");
 //GetComponent().isTrigger = true;
 //GetComponent().enabled = false;
 }
}
using System;
using UnityEngine;
using UnityStandardAssets.CrossPlatformInput;
using UnityStandardAssets.Utility;
using Random = UnityEngine.Random;
namespace UnityStandardAssets.Characters.FirstPerson
{
    [RequireComponent(typeof (CharacterController))]
    [RequireComponent(typeof (AudioSource))]
    public class FirstPersonController : MonoBehaviour
    {
        [SerializeField] private bool m_IsWalking;
        [SerializeField] private float m_WalkSpeed;
        [SerializeField] private float m_RunSpeed;
        [SerializeField] [Range(0f, 1f)] private float m_RunstepLenghten;
        [SerializeField] private float m_JumpSpeed;
        [SerializeField] private float m_StickToGroundForce;
        [SerializeField] private float m_GravityMultiplier;
        [SerializeField] private MouseLook m_MouseLook;
        [SerializeField] private bool m_UseFovKick;
        [SerializeField] private FOVKick m_FovKick = new FOVKick();
        [SerializeField] private bool m_UseHeadBob;
        [SerializeField] private CurveControlledBob m_HeadBob = new CurveControlledBob();
        [SerializeField] private LerpControlledBob m_JumpBob = new LerpControlledBob();
        [SerializeField] private float m_StepInterval;
        [SerializeField] private AudioClip[] m_FootstepSounds;    // an array of footstep sounds that will be randomly selected from.
        [SerializeField] private AudioClip m_JumpSound;           // the sound played when character leaves the ground.
        [SerializeField] private AudioClip m_LandSound;           // the sound played when character touches back on ground.
        private Camera m_Camera;
        private bool m_Jump;
        private float m_YRotation;
        private Vector2 m_Input;
        private Vector3 m_MoveDir = Vector3.zero;
        private CharacterController m_CharacterController;
        private CollisionFlags m_CollisionFlags;
        private bool m_PreviouslyGrounded;
        private Vector3 m_OriginalCameraPosition;
        private float m_StepCycle;
        private float m_NextStep;
        private bool m_Jumping;
        private AudioSource m_AudioSource;
        // Use this for initialization
        private void Start()
        {
            m_CharacterController = GetComponent();
            m_Camera = Camera.main;
            m_OriginalCameraPosition = m_Camera.transform.localPosition;
            m_FovKick.Setup(m_Camera);
            m_HeadBob.Setup(m_Camera, m_StepInterval);
            m_StepCycle = 0f;
            m_NextStep = m_StepCycle/2f;
            m_Jumping = false;
            m_AudioSource = GetComponent();
 m_MouseLook.Init(transform , m_Camera.transform);
        }
        // Update is called once per frame
        private void Update()
        {
            RotateView();
            // the jump state needs to read here to make sure it is not missed
            if (!m_Jump)
            {
                m_Jump = CrossPlatformInputManager.GetButtonDown("Jump");
            }
            if (!m_PreviouslyGrounded && m_CharacterController.isGrounded)
            {
                StartCoroutine(m_JumpBob.DoBobCycle());
                PlayLandingSound();
                m_MoveDir.y = 0f;
                m_Jumping = false;
            }
            if (!m_CharacterController.isGrounded && !m_Jumping && m_PreviouslyGrounded)
            {
                m_MoveDir.y = 0f;
            }
            m_PreviouslyGrounded = m_CharacterController.isGrounded;
        }
        private void PlayLandingSound()
        {
            m_AudioSource.clip = m_LandSound;
            m_AudioSource.Play();
            m_NextStep = m_StepCycle + .5f;
        }
        private void FixedUpdate()
        {
            float speed;
            GetInput(out speed);
            // always move along the camera forward as it is the direction that it being aimed at
            Vector3 desiredMove = transform.forward*m_Input.y + transform.right*m_Input.x;
            // get a normal for the surface that is being touched to move along it
            RaycastHit hitInfo;
            Physics.SphereCast(transform.position, m_CharacterController.radius, Vector3.down, out hitInfo,
                               m_CharacterController.height/2f, Physics.AllLayers, QueryTriggerInteraction.Ignore);
            desiredMove = Vector3.ProjectOnPlane(desiredMove, hitInfo.normal).normalized;
            m_MoveDir.x = desiredMove.x*speed;
            m_MoveDir.z = desiredMove.z*speed;
            if (m_CharacterController.isGrounded)
            {
                m_MoveDir.y = -m_StickToGroundForce;
                if (m_Jump)
                {
                    m_MoveDir.y = m_JumpSpeed;
                    PlayJumpSound();
                    m_Jump = false;
                    m_Jumping = true;
                }
            }
            else
            {
                m_MoveDir += Physics.gravity*m_GravityMultiplier*Time.fixedDeltaTime;
            }
            m_CollisionFlags = m_CharacterController.Move(m_MoveDir*Time.fixedDeltaTime);
            ProgressStepCycle(speed);
            UpdateCameraPosition(speed);
            m_MouseLook.UpdateCursorLock();
        }
        private void PlayJumpSound()
        {
            m_AudioSource.clip = m_JumpSound;
            m_AudioSource.Play();
        }
        private void ProgressStepCycle(float speed)
        {
            if (m_CharacterController.velocity.sqrMagnitude > 0 && (m_Input.x != 0 || m_Input.y != 0))
            {
                m_StepCycle += (m_CharacterController.velocity.magnitude + (speed*(m_IsWalking ? 1f : m_RunstepLenghten)))*
                             Time.fixedDeltaTime;
            }
            if (!(m_StepCycle > m_NextStep))
            {
                return;
            }
            m_NextStep = m_StepCycle + m_StepInterval;
            PlayFootStepAudio();
        }
        private void PlayFootStepAudio()
        {
            if (!m_CharacterController.isGrounded)
            {
                return;
            }
            // pick & play a random footstep sound from the array,
            // excluding sound at index 0
            int n = Random.Range(1, m_FootstepSounds.Length);
            m_AudioSource.clip = m_FootstepSounds[n];
            m_AudioSource.PlayOneShot(m_AudioSource.clip);
            // move picked sound to index 0 so it's not picked next time
            m_FootstepSounds[n] = m_FootstepSounds[0];
            m_FootstepSounds[0] = m_AudioSource.clip;
        }
        private void UpdateCameraPosition(float speed)
        {
            Vector3 newCameraPosition;
            if (!m_UseHeadBob)
            {
                return;
            }
            if (m_CharacterController.velocity.magnitude > 0 && m_CharacterController.isGrounded)
            {
                m_Camera.transform.localPosition =
                    m_HeadBob.DoHeadBob(m_CharacterController.velocity.magnitude +
                                      (speed*(m_IsWalking ? 1f : m_RunstepLenghten)));
                newCameraPosition = m_Camera.transform.localPosition;
                newCameraPosition.y = m_Camera.transform.localPosition.y - m_JumpBob.Offset();
            }
            else
            {
                newCameraPosition = m_Camera.transform.localPosition;
                newCameraPosition.y = m_OriginalCameraPosition.y - m_JumpBob.Offset();
            }
            m_Camera.transform.localPosition = newCameraPosition;
        }
        private void GetInput(out float speed)
        {
            // Read input
            float horizontal = CrossPlatformInputManager.GetAxis("Horizontal");
            float vertical = CrossPlatformInputManager.GetAxis("Vertical");
            bool waswalking = m_IsWalking;
#if !MOBILE_INPUT
            // On standalone builds, walk/run speed is modified by a key press.
            // keep track of whether or not the character is walking or running
            m_IsWalking = !Input.GetKey(KeyCode.LeftShift);
#endif
            // set the desired speed to be walking or running
            speed = m_IsWalking ? m_WalkSpeed : m_RunSpeed;
            m_Input = new Vector2(horizontal, vertical);
            // normalize input if it exceeds 1 in combined length:
            if (m_Input.sqrMagnitude > 1)
            {
                m_Input.Normalize();
            }
            // handle speed change to give an fov kick
            // only if the player is going to a run, is running and the fovkick is to be used
            if (m_IsWalking != waswalking && m_UseFovKick && m_CharacterController.velocity.sqrMagnitude > 0)
            {
                StopAllCoroutines();
                StartCoroutine(!m_IsWalking ? m_FovKick.FOVKickUp() : m_FovKick.FOVKickDown());
            }
        }
        private void RotateView()
        {
            m_MouseLook.LookRotation (transform, m_Camera.transform);
        }
        private void OnControllerColliderHit(ControllerColliderHit hit)
        {
            Rigidbody body = hit.collider.attachedRigidbody;
            //dont move the rigidbody if the character is on top of it
            if (m_CollisionFlags == CollisionFlags.Below)
            {
                return;
            }
            if (body == null || body.isKinematic)
            {
                return;
            }
            body.AddForceAtPosition(m_CharacterController.velocity*0.1f, hit.point, ForceMode.Impulse);
        }
    }
}
Síguenos en nuestro canal de YouTube dedicado a tecnología, marketplace de proyectos tecnológicos, cursos online y tutoriales de desarrollo de videojuegos. Ofrecemos consultoría en desarrollo de software, marketing online, servicios de TI, hosting web, dominios, web y más.